3d Printing Jewelry Design Course For Small Businesses
If you’re running a small business and eyeing the jewelry market, learning 3D printing jewelry design can open up some seriously exciting possibilities. Whether you want to craft your own signature pieces, expand your product line, or boost profit margins, starting with the right course matters. I’m here to break down what to look for, what you’ll learn, and how 3D printing can help your small business thrive in the world of jewelry design.
Why 3D Printing Jewelry Design Makes Sense for Small Businesses
3D printing isn’t just for tech wizards anymore; it’s changing the way smaller brands approach jewelry design. Small businesses no longer have to order hundreds of the same piece or pay huge upfront fees to traditional manufacturers. Instead, you’re able to create unique, custom designs in house without the big overhead.
The 3D printing market for jewelry has climbed steadily, thanks to how flexible it is and how much it lets designers experiment. Big players used to control fine jewelry production, but newer, smaller brands are popping up everywhere, using 3D printing to run lean and get creative. Adding these skills to your toolbox lets you meet customer trends quickly, play around with designs, and keep your business nimble.
For small shops, the ability to custom-make a few special pieces, test ideas, and respond to feedback saves both time and money. You can stand out as a local designer, and even collaborate with customers to bring their dream designs to life. This hands-on approach creates stronger customer connections, and every little advantage matters for a small business trying to gain traction in a crowded market.
The Basics: How 3D Printing Fits into Modern Jewelry Design
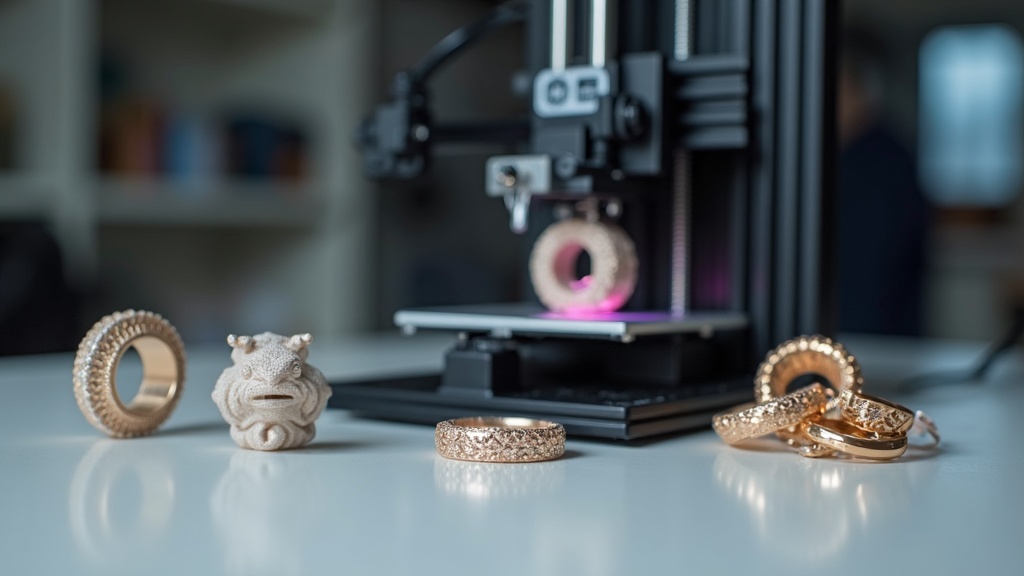
3D printing in jewelry starts with digital modeling and delivers a final piece much faster than traditional methods. You use design software to build a virtual prototype, then send it to a 3D printer. Some businesses print plastic or resin models for lost wax casting, while others print the finished piece directly in metal.
- CAD Design: Most jewelry 3D printing starts with a CAD (computer aided design) file. Mastering this step lets you control every little detail.
- Material Choice: From tough plastic for testing shapes to high end resins and metals for the real thing, different printers use different materials.
- Rapid Prototyping: Small tweaks are simple—just adjust your file and print again. You’re not locked into a mold that costs thousands.
As technology advances, more affordable printers are coming to market. Software is getting easier to use, too. That means a greater number of small business owners can learn the ropes and turn their ideas into physical products, sometimes in the span of a single day.
Getting Started: What to Look for in a 3D Printing Jewelry Design Course
Finding the right course makes all the difference. You don’t need to be a tech expert (I started from scratch myself), but you do want a program that covers more than just basics. Here’s what I’d check out before signing up:
- All-in-one Curriculum: Good courses start with beginnerfriendly CAD tools and go through design theory, prepping files for print, and postprocessing techniques.
- Hands On Projects: Courses that guide you to actually create pieces, like rings or pendants, will help you build skills fast. Look for assignments or workshops that match real business needs.
- Focus on Jewelry: Some 3D design courses cover general subjects. Picking one focused on jewelry means you’ll see tips for texture, sizing, finishing, and wearability right away.
- Business Guidance: A course with bonus content about pricing, selling, and marketing jewelry is pretty handy for small businesses just getting started.
Don’t be afraid to email the instructor or support if you’re unsure whether a course covers a particular topic or software. Experienced educators are usually happy to answer questions; after all, they want students to succeed!
What Small Businesses Learn in a 3D Printed Jewelry Course
Expect to pick up a mix of creative and technical skills. Here are some of the core areas I found super useful:
- 3D Modeling: You’ll learn to use CAD software (like RhinoGold or Blender) to build rings, earrings, pendants, and more. These skills let you go from idea to printable file.
- Understanding Printing Technology: This covers how different 3D printers and materials affect your final design, which is really important for making jewelry that holds up.
- Preparation and Postprocessing: From cleaning the prints to attaching bails and polishing, most courses cover those last steps that take a design from concept to polished product.
- Creating for Casting: Many jewelers use 3D prints to make casts. Courses explain how to prep a print for lost wax casting, which opens up options for silver, gold, or even platinum designs.
On top of the core skills, some advanced courses even discuss how to photograph jewelry effectively for marketing, how to price handcrafted items, and how to document your design process for intellectual property protection.
Common Challenges Starting Out, and How to Tackle Them
Jumping into 3D printing for jewelry definitely comes with a learning curve. Here are a few bumps in the road I hit, plus what I learned to sidestep them:
- Software Overwhelm: CAD tools seem complicated at first glance. Sticking with beginnerfocused lessons and practicing on simple shapes first made it easier for me.
- Material Costs: Good filaments and resins can get pricey. I recommend starting out in basic resin or plastic to save money, then move up to metals later as skills grow.
- Printer Maintenance: Like all tech, printers need a bit of care. Keeping them clean and making sure they’re well set up helps you avoid failed prints, wasted time, and wasted money.
- Detail Resolution: Jewelry often needs high detail. Some entry printers struggle with tiny features, so testing with sample models is a good way to find the best settings.
Getting the Most Out of Your Designs
Starting small helps a lot here. Focus on classic pieces, such as bands, studs, and minimal pendants, then gradually layer in complexity. Asking for customer feedback or testing samples at local popup shops is a smart way to fine tune your designs before a bigger launch.
Don’t be discouraged if your first print isn’t perfect. Keep iterating, and you will quickly improve. Document each stage, so you can easily show off your progress to future customers or on social media channels.
Real-World Uses: What 3D Printing Means for Small Jewelry Makers
Adding 3D printing to your toolkit gives you more than just cool designs. Here’s how it plays out in a small business setting:
- Customization: Personalization is huge in jewelry. With 3D printing, you can easily offer engraving, initials, or madetoorder sizing, without setting up special molds each time.
- Short Run Production: You don’t need to buy hundreds of units. Print what you need, when you need it. That means less cash tied up in inventory.
- Faster Prototyping: Sketch a new idea in the morning, print a sample in the afternoon, and show it to a client the same week. Customers appreciate how fast you can move.
- Lower Startup Costs: Instead of investing in traditional casting setups or large jewelry workshops, you can get started with a desktop printer and hand tools.
Small businesses can also take advantage of local partnerships. Collaborate with nearby art galleries, boutiques, or craft fairs to display and sell 3D printed samples. This sort of networking helps expand your reach and gain valuable feedback.
Tips for Picking the Best Course for Your Goals
With all the options out there, picking the right jewelry 3D printing course can get confusing. Here are a few pointers based on my own experience:
- Look for Recent Updates: The 3D printing world changes fast. Check that the course uses up to date software and covers the printers and materials you’re likely to use.
- Community Support: Learning with others helps. Courses with forums, live Q&A, or online groups give you a network for troubleshooting and feedback as you grow.
- Project Portfolio: Courses with clear project checkpoints leave you with completed jewelry models or finished prints. These are great for marketing to customers or showing off in your shop’s social feeds.
- Check for Open Reviews: Platforms like Udemy, Coursera, or even jewelryspecific communities often have honest reviews and previews. Watching a few sample lessons is worth your time before committing.
Remember, some courses include a private Facebook or Discord group. These communities are treasure troves for asking questions, sharing problems, and even finding your first customers among fellow students!
Frequently Asked Questions
I get a lot of the same questions from other jewelry creators looking to get into 3D printing. Here are a few with practical answers:
Question: Do I need to buy an expensive printer for jewelry design?
Answer: Not at first! Entrylevel resin printers often give great detail for most jewelry pieces. As your skills grow, upgrading to more advanced models makes sense.
Question: What kinds of jewelry work best for 3D printing?
Answer: Rings, pendants, and charms are easiest to start with. These pieces print fast and let you explore different styles while building confidence. More intricate or multipiece designs can come later.
Question: How can I sell my 3D printed jewelry?
Answer: Most small businesses try online shops (like Etsy or Shopify), local craft fairs, or partnering with boutiques. High quality photos and clear descriptions are important for catching customers online.
Question: Is there a learning curve if I’m not tech savvy?
Answer: There’s a bit of one, but beginner friendly courses lead you step by step. Many people with zero prior experience have picked up jewelry 3D design skills—the key is practice and patience.
Using Your 3D Jewelry Printing Skills for Business Growth
Bringing 3D printing into your jewelry business keeps you flexible, creative, and customer focused. Courses that balance design skills, printing knowhow, and a dash of real business advice will prep you to handle everything from custom wedding rings to tiny art inspired charms. It’s worth looking for a course that gets you comfortable with design software, the basics of 3D printers, and business savvy strategies so you’re set for real world action.
Every small business has its own story. Building your own jewelry pieces with 3D printing can open up new opportunities, whether you want to go full custom or just explore what’s possible. If you’re thinking about growing a small jewelry brand, learning the ropes with 3D printing is definitely worth considering.