Email Marketing For Artists

No Comments

Email marketing can be a game changer for artists looking to build an audience, sell artwork, and keep fans engaged with their creative adventure. There’s something powerful about connecting directly with people who are genuinely excited about what you make. Since social platforms can be unpredictable and galleries have their limits, an email list gives you more control over how you share updates, launches, and stories.

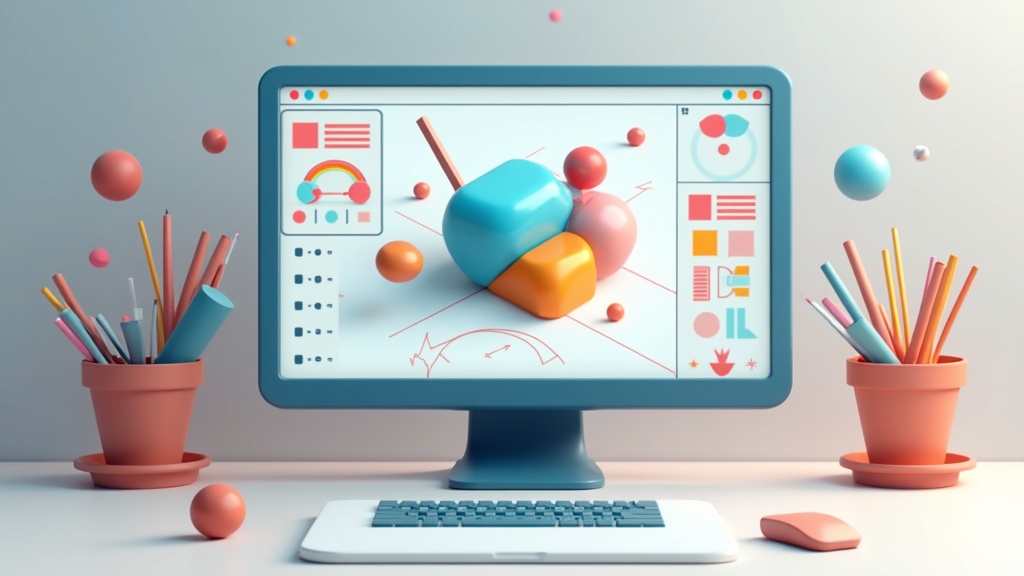
A vibrant and creative artist's workspace featuring sketchbooks, colorful art supplies, a laptop with an email marketing dashboard, and digital artwork previews.

Why Email Marketing Works So Well for Artists

Email stands out as one of those marketing tools that doesn’t rely on complicated algorithms. It’s actually really personal. Unlike social media posts that get buried, your emails land right in someone’s inbox. It’s much easier to build ongoing relationships, announce shows, or even sell pieces without worrying about your post disappearing in someone’s crowded feed.

In recent years, more artists have been moving their focus to direct communication with their audience. As a creative, the ability to share insights into your process and invite subscribers into your world is a unique way to step up your visibility. People love getting early access to new work or hearing about inspiration straight from you, and email is the perfect place for this kind of communication.

Plus, email newsletters tend to have higher engagement rates than most social platform posts. That can turn casual fans into devoted collectors over time.

Building Your Artist Email List from Scratch

The first step in email marketing for artists is starting your own list. If you haven’t set this up yet, it’s never too late. Even if you only have a handful of people at the beginning, a targeted list of people who truly want to follow your adventure is more effective than thousands of unfocused social media followers.

Here are some easy ways to start building your list:

  • Feature a Signup Form on Your Website: A simple form on your homepage or portfolio site makes it clear you have a newsletter worth subscribing to. Offer a sneak peek or a behind the scenes look as a thank you.
  • Collect Emails at Art Shows: Bring a tablet or notebook to events and invite visitors to join your email list for upcoming news, exclusive events, or discounts.
  • Make the Most of Social Media: Share a direct link to your signup form, and explain to your followers what extra value they’ll get from your emails, like first dibs on new art releases or studio sales.

Always ask for permission and be transparent about how you’ll use people’s email addresses. This builds trust and gives your relationship a positive start.

Don’t forget, you can also reach out to those who have purchased from you before and invite them to stay connected through your newsletter. People who’ve bought from you already are more likely to be interested in future updates.

What to Include in Your Art Newsletter

Wondering what to send? Your newsletter can be as creative as your artwork. The best emails give readers a peek into your world, update them on your latest projects, and offer something they can’t get anywhere else.

  • Studio Updates: Share photos or short stories about what’s happening in your studio. This invites your readers into the creative process.
  • New Work Announcements: Giving subscribers access to your latest pieces before anyone else feels pretty special.
  • Behind the Scenes Stories: People love seeing the rough sketches, failed attempts, and progress shots that lead to the finished piece. It’s a great way to build personal connections.
  • Upcoming Events: Announce gallery shows, online exhibitions, or art fairs where people can meet you or see your work in person.
  • Special Offers: A little thank you goes a long way. Offer exclusive discounts, early bird tickets, or downloadable art for your email subscribers.

Consistency is important. Decide how often you’ll send your emails and stick to it, whether that’s monthly, biweekly, or every time you have fresh work to share.

Quick Guide to Setting Up Your First Art Email Campaign

Getting started with email marketing doesn’t mean you need to spend a lot of time or money. Plenty of userfriendly tools make the process smooth and even a bit fun. Here’s a simple workflow that works for most artists:

  1. Choose an Email Service Provider (ESP): There are plenty of great, affordable (even free) options like Mailchimp, ConvertKit, or MailerLite. These platforms help you manage your list, design emails, and automatically follow privacy rules.
  2. Design a Welcome Email: Set up an automated message that new subscribers get right away. Share your story, what people can expect from your emails, and maybe include a small thank you download or preview.
  3. Draft Your First Campaign: Keep your design clean. Photos of your art, a couple of small stories, links to view or shop, and social media handles are a good start.
  4. Test and Send: Preview your email, check for typos, make sure all the links work, and send it to yourself first to see what your subscribers will experience. Then hit send!
  5. Check Your Results: Most email platforms show you how many people opened your message and clicked your links. See what’s working so you can adjust future emails.

These steps are easy to repeat, and over time, you’ll get a sense of what your readers like best. Remember, a little personality goes a long way to keep people reading.

Things to Watch Out for With Email Marketing

Email marketing comes with its own set of challenges, especially if you’re new to it. Here are a few things that can trip up artists, plus some easy ways to handle them:

  • Staying Consistent: Sending emails on a set schedule keeps people engaged and helps you build a habit of sharing. Try drafting a batch of emails in one sitting or jot down ideas as they come to you.
  • Writer’s Block: Not sure what to say? Keep a list of behind the scenes anecdotes, works in progress shots, or simple updates from your daily routines to pull from when inspiration is low.
  • Staying Legal: Make sure you include an easy way to unsubscribe, and never add people to your list without their permission. Following privacy laws (like GDPR or CAN SPAM) builds trust and helps you avoid problems.
  • Keeping Emails Out of the Spam Folder: Avoid using too many salesy phrases in your subject line, keep your mailing list updated, and always have permission before sending messages.

Consistency is Key

One of the main challenges for artists is sticking to a regular schedule. Even sending just one email each month helps your art stay at the top of people’s minds. Many artists find that writing a few drafts ahead or batching photos helps keep things on track during busy weeks.

To help with consistency, you might want to set specific calendar reminders or dedicate a time each month just for newsletter prep. When things get busy, having a quick checklist ready can ensure you don’t skip a month unintentionally.

Respecting Subscriber Privacy

Protecting your subscribers’ information is really important. Use your email platform’s built in privacy features, double check your signup process, and keep your lists safe from sharing or public posting. If anyone ever wants off your list, make sure it’s quick and simple for them to opt out.

Trust is key. Don’t share your subscribers’ information with anyone. Make sure to only send what people have agreed to receive, and revisit privacy best practices every now and then as laws and expectations can change.

Advanced Tips for Artists Ready to Take It Up a Notch

Once you’re comfortable with the basics, you can use a few extra tricks to make your email marketing even more effective.

Segment Your List: Some fans might be interested mostly in original paintings, while others want updates on print releases or workshops. Dividing your list lets you send the most relevant content to the right people. Your email platform should help make this easy without any technical hassle.

Include Personal Stories: Adding a quick note on what inspired your latest collection or a funny studio mishap can set your emails apart from typical gallery announcements. Storytelling helps build deeper connections with your subscribers.

Invite Responses: Ask questions, invite feedback, or run a simple survey. When subscribers reply, it signals email platforms that your messages should stay out of spam, and you get useful feedback straight from your fans. You can use these answers to tailor future emails and personalize your messages even more.

Showcase Customer Photos: If collectors share photos of your work in their homes, include them (with permission). This adds social proof and encourages others to share their own finds. Sharing these stories can also inspire other readers to imagine your art in their own spaces.

Analyze Your Performance: Check which type of content gets the most clicks or replies. Over time, tracking engagement and open rates will help you refine your approach. Remember to keep evolving your newsletter based on what’s working best with your audience.

Tools and Resources Every Artist Should Know About

Having the right tools makes email marketing more straightforward. Here are some platforms and resources I recommend checking out:

  • Mailchimp: Popular for its free starter tier and great templates that are easy to customize.
  • ConvertKit: Popular with creators for its simple automations and clean signup forms.
  • MailerLite: Low cost and really userfriendly, plus it has nice drag and drop email designers.
  • Figma: For creating simple graphics if you want to jazz up your newsletter with custom banners or section dividers.

There’s no need to overspend here. Most of these platforms give you plenty of options for free or at a low price. Choose one you find the easiest to use and that fits the look you want for your brand.

Some additional helpful resources include YouTube tutorials for whichever ESP you choose, and online communities for artists where people share tips about email platforms. Many platforms also offer their own guides for setting up automations or beautiful templates, which can save you a lot of time as you tweak your design.

Frequently Asked Questions

Here are a few questions I often get from artists thinking about starting email marketing:

How many emails should I send each month?
Most artists find that one or two emails a month is plenty. Aim for consistency over frequency. What matters is that your audience knows what to expect from you.


Do I need a website first?
Having a website with a mailing list signup form can help, but you can start building your list using social media and email platforms even before launching your own site.


What kind of content works best for art newsletters?
Stories, new artwork reveals, and behind the scenes updates get the most engagement. People follow artists for inspiration and personal connection, so sharing a bit of your personality really helps.


How do I keep subscribers interested over time?
Mix things up by sharing process stories, collector highlights, sneak previews, and personal milestones. Don’t be afraid to experiment with new types of content now and then to see what sparks the most enthusiasm.

Wrapping Up: Email Marketing for Artists

Building an art career is about more than creating beautiful work. It’s about building connections. Email marketing gives you a reliable, personal way to invite people into your creative world, turn passersby into collectors, and grow a community around your unique style. Start simple, keep it personal, and watch your audience grow one email at a time. There’s no need to overthink it—just let your passion and personality shine through every message you send.

Sculpture Can Mean Anything

No Comments

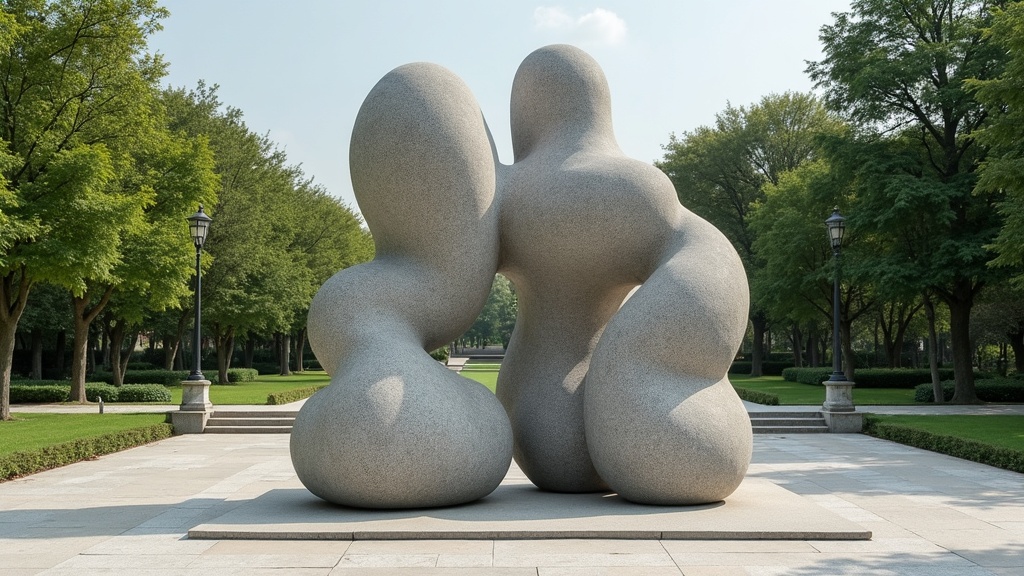
Abstract stone sculpture in a public parkSculpture has always pushed the limits of what art can be. It’s a practice full of possibilities and bold interpretations.


Q1: What does sculpture mean today?

These days, sculpture isn’t just traditional statues carved from marble or bronze. It now includes everything from mixed media installations and found object art to digital and outdoor work. If it takes up space or plays with form, most artists and viewers are happy to call it sculpture. More recently, people have tracked down sculpture in unexpected places—parks, shopping centers, or even the virtual world. The popular definition of sculpture keeps changing as artists jump into new materials and tech. As a result, the art scene always seems to be stepping up its game and showing off next-level cool sculpture ideas that turn heads and spark conversations.


Q2: Can sculpture exist without physical material?

Absolutely. Some contemporary artists work with ideas, light, or sound, and the result is just as much a sculpture as a marble bust. For example, a light installation that changes a room’s mood can fit right into a modern sculpture exhibit. Even completely digital pieces, like interactive 3D environments, set free the possibilities of sculptural thinking by breaking away from the usual materials and forms.


Q3: How can everyday objects become sculpture?

Everyday items, like chairs, shoes, or even kitchen utensils, can be arranged or combined in surprising ways. When you stack, bend, or transform them, they invite new thoughts. Artists have even used junkyard scraps to make something that feels fresh and powerful. These creative switches give a boost to the viewer’s imagination, making us see “ordinary” stuff in a whole new light. Sometimes, people even mirror iconic sculptures using nothing but objects from home—blending humor and eye-catching visual style along the way.


Q4: Why do people say sculpture is anything?

Sculpture doesn’t have just one definition. Artists love to stretch rules, so anything that plays with space, shape, or even a new idea can become a sculpture. There’s no single right answer, just lots of creative directions. From the studio to the sidewalk, artists keep mixing things up by playing with forms and concepts, proving sculpture can be as open or as specific as you want it to be. In the end, it’s about letting your art direction shine through and inspiring others to get involved with the world of sculpture.

Side note:

My belief is,

“As long as your actions reflect the mindset of a sculptor—shaping with intention and patience—your reality will become a sculpture of your vision. Keep refining, and you’ll align with the masterpiece you’re meant to create.”

3d Printing Jewelry Design Course For Small Businesses

No Comments

If you’re running a small business and eyeing the jewelry market, learning 3D printing jewelry design can open up some seriously exciting possibilities. Whether you want to craft your own signature pieces, expand your product line, or boost profit margins, starting with the right course matters. I’m here to break down what to look for, what you’ll learn, and how 3D printing can help your small business thrive in the world of jewelry design.

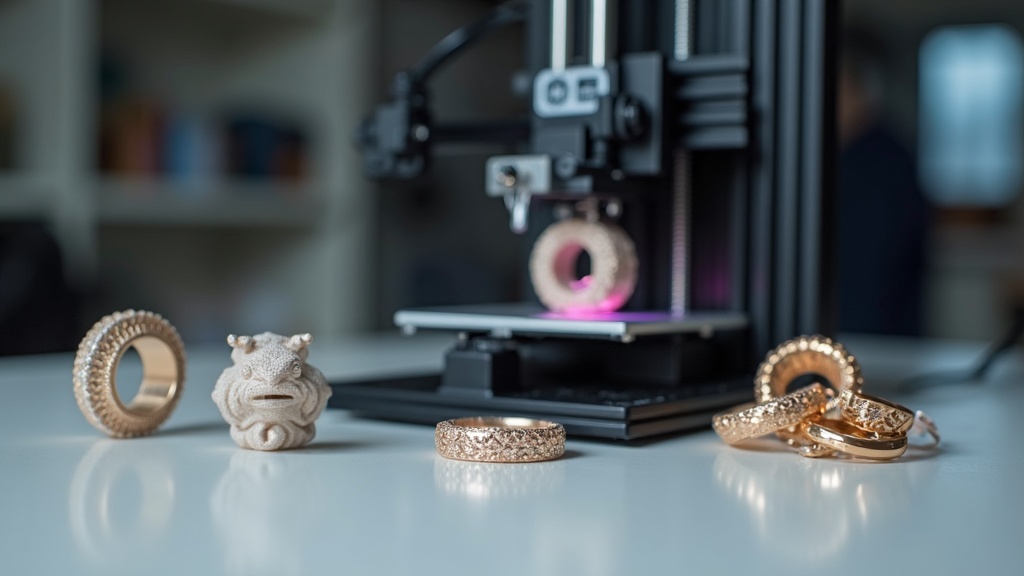
A 3D printer in action creating an intricate jewelry piece, with spools of resin or filament and finished shiny jewelry pieces around it.

Why 3D Printing Jewelry Design Makes Sense for Small Businesses

3D printing isn’t just for tech wizards anymore; it’s changing the way smaller brands approach jewelry design. Small businesses no longer have to order hundreds of the same piece or pay huge upfront fees to traditional manufacturers. Instead, you’re able to create unique, custom designs in house without the big overhead.

The 3D printing market for jewelry has climbed steadily, thanks to how flexible it is and how much it lets designers experiment. Big players used to control fine jewelry production, but newer, smaller brands are popping up everywhere, using 3D printing to run lean and get creative. Adding these skills to your toolbox lets you meet customer trends quickly, play around with designs, and keep your business nimble.

For small shops, the ability to custom-make a few special pieces, test ideas, and respond to feedback saves both time and money. You can stand out as a local designer, and even collaborate with customers to bring their dream designs to life. This hands-on approach creates stronger customer connections, and every little advantage matters for a small business trying to gain traction in a crowded market.

The Basics: How 3D Printing Fits into Modern Jewelry Design

3D printing in jewelry starts with digital modeling and delivers a final piece much faster than traditional methods. You use design software to build a virtual prototype, then send it to a 3D printer. Some businesses print plastic or resin models for lost wax casting, while others print the finished piece directly in metal.

  • CAD Design: Most jewelry 3D printing starts with a CAD (computer aided design) file. Mastering this step lets you control every little detail.
  • Material Choice: From tough plastic for testing shapes to high end resins and metals for the real thing, different printers use different materials.
  • Rapid Prototyping: Small tweaks are simple—just adjust your file and print again. You’re not locked into a mold that costs thousands.

As technology advances, more affordable printers are coming to market. Software is getting easier to use, too. That means a greater number of small business owners can learn the ropes and turn their ideas into physical products, sometimes in the span of a single day.

Getting Started: What to Look for in a 3D Printing Jewelry Design Course

Finding the right course makes all the difference. You don’t need to be a tech expert (I started from scratch myself), but you do want a program that covers more than just basics. Here’s what I’d check out before signing up:

  • All-in-one Curriculum: Good courses start with beginnerfriendly CAD tools and go through design theory, prepping files for print, and postprocessing techniques.
  • Hands On Projects: Courses that guide you to actually create pieces, like rings or pendants, will help you build skills fast. Look for assignments or workshops that match real business needs.
  • Focus on Jewelry: Some 3D design courses cover general subjects. Picking one focused on jewelry means you’ll see tips for texture, sizing, finishing, and wearability right away.
  • Business Guidance: A course with bonus content about pricing, selling, and marketing jewelry is pretty handy for small businesses just getting started.

Don’t be afraid to email the instructor or support if you’re unsure whether a course covers a particular topic or software. Experienced educators are usually happy to answer questions; after all, they want students to succeed!

What Small Businesses Learn in a 3D Printed Jewelry Course

Expect to pick up a mix of creative and technical skills. Here are some of the core areas I found super useful:

  • 3D Modeling: You’ll learn to use CAD software (like RhinoGold or Blender) to build rings, earrings, pendants, and more. These skills let you go from idea to printable file.
  • Understanding Printing Technology: This covers how different 3D printers and materials affect your final design, which is really important for making jewelry that holds up.
  • Preparation and Postprocessing: From cleaning the prints to attaching bails and polishing, most courses cover those last steps that take a design from concept to polished product.
  • Creating for Casting: Many jewelers use 3D prints to make casts. Courses explain how to prep a print for lost wax casting, which opens up options for silver, gold, or even platinum designs.

On top of the core skills, some advanced courses even discuss how to photograph jewelry effectively for marketing, how to price handcrafted items, and how to document your design process for intellectual property protection.

Common Challenges Starting Out, and How to Tackle Them

Jumping into 3D printing for jewelry definitely comes with a learning curve. Here are a few bumps in the road I hit, plus what I learned to sidestep them:

  • Software Overwhelm: CAD tools seem complicated at first glance. Sticking with beginnerfocused lessons and practicing on simple shapes first made it easier for me.
  • Material Costs: Good filaments and resins can get pricey. I recommend starting out in basic resin or plastic to save money, then move up to metals later as skills grow.
  • Printer Maintenance: Like all tech, printers need a bit of care. Keeping them clean and making sure they’re well set up helps you avoid failed prints, wasted time, and wasted money.
  • Detail Resolution: Jewelry often needs high detail. Some entry printers struggle with tiny features, so testing with sample models is a good way to find the best settings.

Getting the Most Out of Your Designs

Starting small helps a lot here. Focus on classic pieces, such as bands, studs, and minimal pendants, then gradually layer in complexity. Asking for customer feedback or testing samples at local popup shops is a smart way to fine tune your designs before a bigger launch.

Don’t be discouraged if your first print isn’t perfect. Keep iterating, and you will quickly improve. Document each stage, so you can easily show off your progress to future customers or on social media channels.

Real-World Uses: What 3D Printing Means for Small Jewelry Makers

Adding 3D printing to your toolkit gives you more than just cool designs. Here’s how it plays out in a small business setting:

  • Customization: Personalization is huge in jewelry. With 3D printing, you can easily offer engraving, initials, or madetoorder sizing, without setting up special molds each time.
  • Short Run Production: You don’t need to buy hundreds of units. Print what you need, when you need it. That means less cash tied up in inventory.
  • Faster Prototyping: Sketch a new idea in the morning, print a sample in the afternoon, and show it to a client the same week. Customers appreciate how fast you can move.
  • Lower Startup Costs: Instead of investing in traditional casting setups or large jewelry workshops, you can get started with a desktop printer and hand tools.

Small businesses can also take advantage of local partnerships. Collaborate with nearby art galleries, boutiques, or craft fairs to display and sell 3D printed samples. This sort of networking helps expand your reach and gain valuable feedback.

Tips for Picking the Best Course for Your Goals

With all the options out there, picking the right jewelry 3D printing course can get confusing. Here are a few pointers based on my own experience:

  • Look for Recent Updates: The 3D printing world changes fast. Check that the course uses up to date software and covers the printers and materials you’re likely to use.
  • Community Support: Learning with others helps. Courses with forums, live Q&A, or online groups give you a network for troubleshooting and feedback as you grow.
  • Project Portfolio: Courses with clear project checkpoints leave you with completed jewelry models or finished prints. These are great for marketing to customers or showing off in your shop’s social feeds.
  • Check for Open Reviews: Platforms like Udemy, Coursera, or even jewelryspecific communities often have honest reviews and previews. Watching a few sample lessons is worth your time before committing.

Remember, some courses include a private Facebook or Discord group. These communities are treasure troves for asking questions, sharing problems, and even finding your first customers among fellow students!

Frequently Asked Questions

I get a lot of the same questions from other jewelry creators looking to get into 3D printing. Here are a few with practical answers:

Question: Do I need to buy an expensive printer for jewelry design?
Answer: Not at first! Entrylevel resin printers often give great detail for most jewelry pieces. As your skills grow, upgrading to more advanced models makes sense.


Question: What kinds of jewelry work best for 3D printing?
Answer: Rings, pendants, and charms are easiest to start with. These pieces print fast and let you explore different styles while building confidence. More intricate or multipiece designs can come later.


Question: How can I sell my 3D printed jewelry?
Answer: Most small businesses try online shops (like Etsy or Shopify), local craft fairs, or partnering with boutiques. High quality photos and clear descriptions are important for catching customers online.


Question: Is there a learning curve if I’m not tech savvy?
Answer: There’s a bit of one, but beginner friendly courses lead you step by step. Many people with zero prior experience have picked up jewelry 3D design skills—the key is practice and patience.


Using Your 3D Jewelry Printing Skills for Business Growth

Bringing 3D printing into your jewelry business keeps you flexible, creative, and customer focused. Courses that balance design skills, printing knowhow, and a dash of real business advice will prep you to handle everything from custom wedding rings to tiny art inspired charms. It’s worth looking for a course that gets you comfortable with design software, the basics of 3D printers, and business savvy strategies so you’re set for real world action.

Every small business has its own story. Building your own jewelry pieces with 3D printing can open up new opportunities, whether you want to go full custom or just explore what’s possible. If you’re thinking about growing a small jewelry brand, learning the ropes with 3D printing is definitely worth considering.

Color Theory Masterclass: Online Courses To Improve Your Palette Skills

No Comments

Sharpening your color skills can totally change the way you create art or design. Whether you’re a hobbyist just starting out or a working professional wanting to refresh your eye, color theory is a foundation worth focusing on. I’ve found that online courses are pretty handy for getting into practical skills and techniques to take your palette game up a notch. If you’re feeling a bit lost when it comes to mixing, matching, or confidently picking colors, there are a bunch of interactive and selfpaced resources to guide you through the essentials and beyond. So if you’re up for a color theory masterclass, I’ve rounded up the best options and tips to get you started.

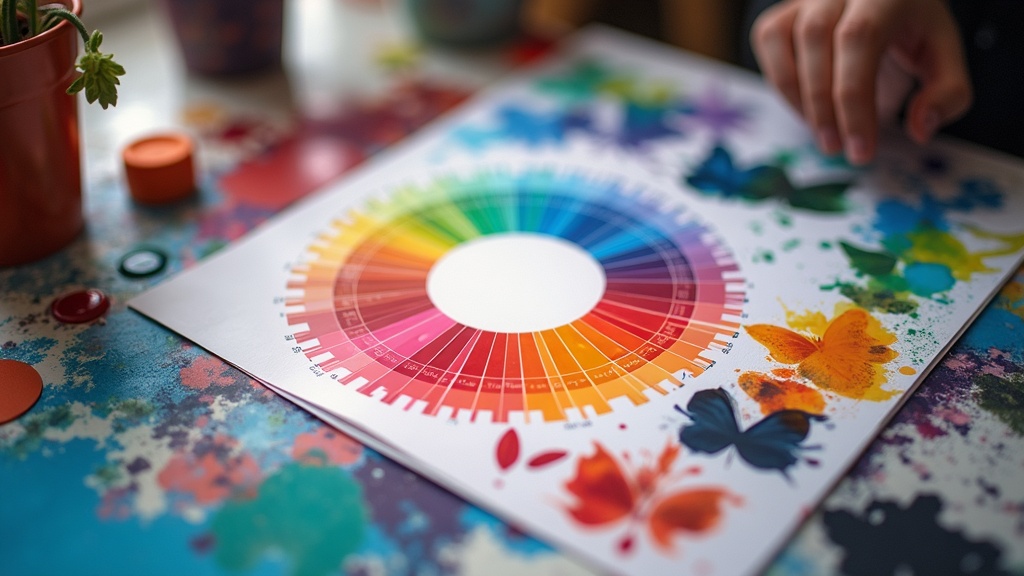
A vibrant digital color wheel and blending swatches, paintbrushes and digital tools on a colorful workspace

Why Mastering Color Theory Matters for Creative Work

Understanding color isn’t just about picking pretty shades. For a painter, knowing why warm and cool tones look good together makes scenes pop. For designers, the right palette can drive more attention, and more sales. Color theory teaches you how colors interact and what moods or reactions certain combinations can cause in viewers.

Color use in digital art, graphic design, photography, and traditional painting all benefit from some color knowledge. A recent Adobe study suggests that posts with thoughtfully chosen palettes are more likely to catch the eye on digital platforms. So if you want every project to land stronger, it’s worth spending time building up your color skills.

Color systems and theories go back centuries. Online learning has opened new doors for tackling color foundations in hands-on ways, making oldschool ideas feel fresh and easy to apply. These courses help remove the guesswork that often comes with choosing hues or building entire moods with color.

Getting Started With Online Color Theory Courses

Color theory courses are way more interactive than those dry old textbooks. Most start with simple explanations—like primary, secondary, and tertiary colors—before walking you into topics such as color temperature, contrast, and harmony.

Most online courses let you move at your own pace. That’s been a huge help for me, especially when trying to balance art with daily life. Here’s what you might find inside a typical beginnerfriendly course:

  • Color Wheel Functions: How to build and use a color wheel as your navigation tool.
  • Understanding Color Schemes: Tips for picking colors that vibe well together, like complementary, analogous, or triadic schemes.
  • Value & Saturation: Adjusting brightness and intensity for realistic or dramatic effect.
  • Color Psychology: Ways colors impact emotions and how to use this in your own work.

Courses often include exercises. For example, you might upload a photo and use digital paint tools to switch its palette or remix a classic painting’s colors. These are great for getting feedback and seeing your progress.

Quick Guide: Choosing the Best Course for Your Palette Goals

Online learning platforms are filled with color theory options, but not every course is made equal. Picking the right one will save you a lot of time and help you stick with it. Here are some easy to use tips for making your choice:

  1. Assess Your Level: Some courses focus on basics, while others target advanced techniques like digital painting or branding. Choose one that fits your background and ambitions.
  2. Check for Interactive Elements: Video demos, community critique, and downloadable resources all help you apply what you learn.
  3. Read Reviews: Look for courses with plenty of student feedback, this usually means you’ll get more actionable content.
  4. Preview the Curriculum: Some platforms let you preview the lesson outline. This can help you see if the topics match what you want to improve on.
  5. Policy on Lifetime Access: Life happens, so courses that let you repeat lessons or come back later are really helpful.

Stacking these factors makes choosing a relevant, worthwhile course much easier. Think about your own workflow and learning style before you get into it.

Common Challenges and How Online Courses Help

Even with a stack of reference books in my studio, I used to hit a wall with applying color theory. Here are a few struggles I’ve seen (and some online course perks that smooth things out):

  • Color Mixing Confusion: Watching guided mixing demonstrations online helps clear up misunderstandings about blending paint or digital swatches.
  • Palette Paralysis: Prebuilt color harmonies and exercises help spark new ideas and break you out of a creative rut.
  • Lack of Feedback: Courses with community spaces or mentor input let you get real advice on your color choices.
  • Applying Color Digitally: Many courses include tips and shortcuts for picking colors on tablets, in Photoshop, or with design software.

Mixing Paint vs. Digital Color

Paint, pencils, and pixels all mix differently. Hands-on demonstrations found in online lessons helped me avoid muddy paint colors and banded digital gradients. Some courses split up lessons for different mediums, which can be super helpful if you switch between digital and traditional work.

Analyzing Existing Art

Many online lessons walk you through tracking down color schemes in popular works, including paintings, movies, and ads. This practical breakdown makes the “why” of color choices more obvious, even for beginners. When you look over a classic work or a nextlevel cool ad campaign, you’ll start to spot the thinking behind every color choice. Breaking it down like this builds your own creative eye, so you can start to make bolder color decisions in your own projects.

Course Features You’ll Want to Check Out

Not all color courses include the same bells and whistles. Here are some cool features that I find worth considering:

  • Live or Recorded Demos: These let you observe technique in real time or rewind for tricky sections.
  • Quizzes and Practice Projects: Testing comprehension with fun challenges keeps you involved and helps strengthen memory.
  • Downloadable Reference Sheets: Quick reference guides on harmony rules or swatchmixing methods can sit on your desk or tablet while you work.
  • Community Forums: Learning from others can spark fresh ideas and show new ways to use theory.

Practical add-ons like these can make a course much easier to stick with and keep you coming back. Having these tools at your fingertips can give a boost to your workflow and keep you motivated along the way.

Types of Creative Work That Benefit From Color Training

  • Digital Art and Illustration: Balanced palettes and unique color harmonies make characters, scenes, and icons pop on screens.
  • Painting (Acrylic, Watercolor, Oil): Knowing how to mix and use color temperature is great for realism, depth, and mood.
  • Photography & Editing: Adjusting tones digitally can make or break a photo’s vibe.
  • Brand Design: Strategic color use helps companies nail their identity and improve recognition.
  • Web and UI Design: Good color choices improve readability and make websites more inviting to visitors.

Whatever your field, solid color skills go a long way. Color theory is a smart investment in any creator’s toolkit. The creative world—from gaming designers to muralists—is always looking for folks with a sharp sense of color. Even if you’re only creating art for yourself, understanding palettes can help you bring to life work that feels finished and unified. Plus, having color theory on your resume is appealing to clients and employers, signaling you’ve got an eye for detail.

Frequently Asked Questions About Color Theory Online Courses

Here are answers to some questions I get asked a lot by folks wanting to learn more about using color:

Question: How long does it take to see progress with color theory?
Answer: Most people notice improvements in just a few weeks if they practice with the exercises. Reviewing and redoing lessons helps a lot, too.


Question: Can I really improve without expensive supplies?
Answer: Yes! Many courses are digital and need nothing but a laptop or tablet. For traditional art, studentgrade paints and papers are fine for learning purposes.


Question: Do I need previous art or design experience?
Answer: No. Many beginners start from scratch. Some courses break big ideas into manageable parts, which can be less overwhelming for new learners.


Question: Are there free options or lowcost color theory courses?
Answer: Definitely. Websites like Coursera, Udemy, and Skillshare have bargains and free trials. YouTube is packed with highquality lessons by professional artists, though these might lack handson feedback.

Wrapping Up: Why Color Learning Online Really Pays Off

I’ve found that building strong color skills pays off every time I start a creative project. Online color theory courses offer practical feedback, engaging exercises, and realworld examples that help you move ideas from your head to finished art, fast. Once you stop worrying about picking the “right” color and start understanding the “why,” creativity flows so much easier. Take your time, enjoy the process, and watch how much better your palette gets, one lesson at a time.

If you want extra tips, don’t forget to check in with online communities and color theory forums. Sharing your work and ideas can give a boost to your skills and open up entirely new ways of thinking about color. There’s always more to spot and more to try out as you keep creating, so keep pushing your palette further. Soon, you’ll be the one other people turn to for advice on making their art come to life.

Creative Wordplay Narratives

No Comments

Creative wordplay narratives bring language to life in the same way a sculptor shapes clay. Playing with words, bending their meanings, and building something new with them is one of my favorite aspects of storytelling. There’s pure joy in twisting a phrase just right or stacking puns until everything feels unexpectedly clever. Whether I’m weaving a mystery around a misplaced comma or building a whole world where idioms come alive, wordplay adds color and fun that’s hard to beat.

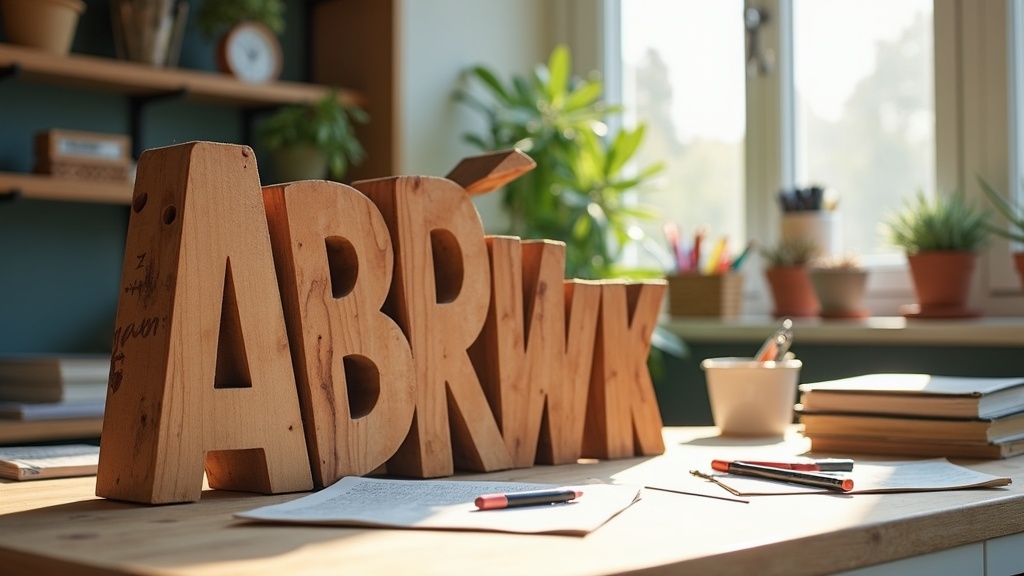
Sculpted letters forming playful word structures on a wooden desk.

What Are Creative Wordplay Narratives?

Wordplay in narratives is like molding words into unexpected shapes, just as a sculpture takes a lump of material and transforms it into art. This kind of writing isn’t about piling up puns for laughs, although humor is a big part; it’s about using the quirks and layers of language to drive a story or reveal fresh meaning. Wordplay can sneak into nearly any writing style, from short stories to novels or even clever poetry. Sometimes, it’s subtle: a sly double meaning or a clever turn of phrase. Other times, it’s the main character, as in entire worlds built on puns, riddles, or playful metaphors.

This approach keeps readers guessing and invites them to become part of a playful reading experience. For new writers, wordplay narratives offer a chance to experiment with style. They open doors to bend language and get creative with storytelling conventions. Famous examples of wordplay-laden stories include works by Lewis Carroll and Douglas Adams, but the field is wide open for anyone with a love of language looking to get creative.

Getting Started: Tools and Techniques for Word Sculptors

Jumping into creative wordplay narratives doesn’t require any fancy supplies. If you’ve got a grasp of language, a sharp sense of play, and a willingness to tinker, you’re already well equipped. I find that reading widely and jotting down interesting words or turns of phrase helps build a mental “toolbox” for wordplay.

  • Homophones: Using words that sound alike but have different meanings or spellings (like “night” and “knight”) brings plenty of comedic and narrative potential.
  • Puns: Easy to pick up but tricky to master, puns are the backbone of playful language. They ask the reader to dig deeper for the joke or the heart of a sentence.
  • Idioms and Clichés: Flipping familiar phrases (“the early bird catches the worm” becomes “the early worm gets eaten”) can add surprise or even dark humor to a story.
  • Word Sculpting: Taking a word or phrase and twisting its structure, sound, or meaning to reshape the narrative. This could be as simple as using spoonerisms or as complex as creating characters who are literal puns.

Practicing these techniques in short vignettes works well for beginners. Sometimes I’ll try writing a paragraph where every sentence contains an alliteration or a secret rhyme, just to see where the language takes me. It’s a fun way to stretch those creative muscles and stumble upon some unexpected results.

Quick Guide: Building Playful Narratives

Writing stories packed with wordplay is pretty rewarding, especially when the puns and twists land just right. Here’s how I like to shape my creative process:

  1. Pick Your Wordplay: Decide on your focus—is it going to be puns, homophones, or twisting idioms?
  2. Choose a Theme: Some topics lend themselves naturally, for example, stories set in a bakery full of bun jokes or a detective story where clues are word riddles.
  3. Set the Mood: The right tone is important. If you’re aiming for humor, keep things light and breezy. For more serious pieces, use wordplay to add subtle meaning without overpowering the story.
  4. Let Characters Lead: Give characters quirky names or have them speak in riddles. Dialogue is the perfect playground for word sculpting.
  5. Revise and Polish: Like any creative work, wordplay narratives benefit from editing. Remove anything that feels forced, and let the clever turns shine naturally.

Sometimes, I work backward, starting with a fun phrase and building the whole story around it. Other times, the plot comes first, and I look for opportunities to sneak in puns or clever double meanings. Often, crafting a story becomes an adventure in itself, as the language guides the way.

Troubles You Might Run Into (and How to Handle Them)

Creative wordplay writing comes with its own set of challenges. I’ve found a few bumps along the way that are worth sharing, especially if you’re new to this sculptural style:

  • Pun Overload: Packing in too many puns or jokes can make a story feel heavy handed. Try spacing out clever wordplay and using it to punch up important moments.
  • Clarity vs. Cleverness: Sometimes, a twisty phrase can confuse readers if not handled with care. I often check my work by reading aloud or having someone else review it. If the meaning is lost, I trim or rewrite.
  • Balancing Humor and Story: It’s easy to fall in love with a pun and let the narrative take a back seat. I try to keep the story on track and use wordplay as an accent, not the whole centerpiece (unless the joke is the point!), so the plot still shines through.
  • Making It Accessible: Not everyone catches the same references. Picking widely understood idioms and jokes is a good way to keep things relatable, but sprinkling in a few clever, niche gags can reward more attentive readers.

When the language starts to feel like a knot, I step back, reread, and hack away at what isn’t working. Sometimes the simplest word sculpture makes the strongest impression. It’s important to remember that wordplay should serve your story, not overshadow it.

Pun Overload

Early drafts of my stories often end up crowded with puns. I try to stick to two or three big wordplay moments per scene or chapter, then build out from there if I think it needs more. A good mix of word jokes and regular narrative gives breathing space and lets the reader enjoy the humor without getting overwhelmed.

Keeping Things Clear

Readers should always know what’s happening. I’ve learned to trust my editor brain. A clever joke loses its punch if readers are stuck figuring out the story underneath. Simplicity, with a touch of wordplay, tends to work best, letting the clever writing highlight the plot rather than muddy it.

Balancing Story with Witty Language

It’s tempting to cook up a story around a single hilarious phrase, but I try not to let the art of the word outshine the actual storytelling. Making sure every bit of wordplay serves the story, and not just the writer’s ego, keeps things well balanced.

Stepping Beyond: Advanced Word Sculpting

For those comfortable with basic techniques, there’s a whole world of advanced language play out there. Surreal story logic, such as creating lands where metaphors are real, brings depth and weirdness to narratives. Some of my favorite ways to up the wordplay game include:

Inventing New Words: Combining words or crafting clever portmanteaus lets you show off both creativity and narrative inventiveness. For example, blending “brunch” from “breakfast” and “lunch” creates a new word—and so can you, giving your story a unique flavor.

Building Worlds with Idioms: What if raining cats and dogs was literal? I once wrote a setting where running around like headless chickens meant you actually had to watch your footing! Playing with idioms in this way opens up all sorts of creative possibilities.

True Dialogue Sculpting: Letting dialogue sparkle with well placed spoonerisms, mondegreens, or anagrams pulls readers in and sharpens character voices. It also turns your characters’ conversations into puzzles and fun discoveries for your audience.

Wordplay narratives for kids work especially well—think of picture books where each page is built on a different pun, or junior mystery novels where clues are hidden in word choice itself. For more grownup fare, subtle references or witty exchanges might fit better. Consider playing with ambiguity or double meanings to add layers for attentive readers to unearth.

Real World Uses and Word Art Applications

Wordplay doesn’t stay locked on the page. Businesses, marketing pros, and comedians use it all the time to grab attention or make a product stick in your head (“Lettuce Eat,” anyone?). In digital content, clever headlines and playful hashtags work wonders. Even poets and songwriters return to it again and again for hooks that echo in your memory.

  • Children’s Books: Word riddles and punny stories grow language development and make reading fun for young readers, setting a strong foundation for future literary enjoyment.
  • Marketing: Catchy, punfilled slogans give brands a memorable twist and set them apart in crowded markets. They are tools to make a message linger.
  • Games: Board games, puzzles, or escape rooms often use language play to craft clues and spark laughs, pushing players to think creatively.
  • Personal Essays: Sprinkling in a bit of wordplay lightens heavier topics or builds rapport with readers, letting them connect on a more playful level.

I’ve even sculpted personalized poems for friends using only their favorite jokes and puns; these are always a hit at parties or birthdays, offering a truly unique and memorable gift.

Whether you’re working on a novel or coming up with a catchy slogan for a new business, wordplay can be your secret ingredient. It’s about being playful, observant, and a little bit daring with language. Try paying closer attention to the ads, jokes, and clever phrases you hear in daily life—they’re everywhere, and they prove how much fun language can be!

Frequently Asked Questions

Writers new to crafting wordplay-heavy tales often have questions. Here are a few common ones I’ve run across:

What’s the easiest way to try wordplay in my own writing?
Answer: Start with an everyday phrase and turn it on its head, or toss some puns into your next short story draft. The more you play, the easier it gets. Even adding a single unexpected rhyme or alliteration can make your writing feel fresher.


How do I avoid overdoing it with puns?
Answer: Read your work aloud, or give it to a friend. If the jokes distract from the story or feel forced, scale them back and focus on quality over quantity.


Can I use wordplay in serious writing?
Answer: Absolutely. Subtle word choices and double meanings can add depth and intrigue, whether or not humor is the main goal. Even in drama, a clever turn of phrase can make a scene sparkle.


Shaping Your Own Word Sculptures

Sculpting stories from wordplay turns language from a tool into a playground. Crafting a narrative where each twist of phrase means something, or where punchlines reveal hidden truths, adds layers of enjoyment for both writer and reader. It’s more about practicing, reading, and having fun with language than sticking to rules. Next time you pick up your pen or open your laptop, try tossing in a pun, flipping an idiom, or letting your narrative become a sculpture shaped from words. You’ll stumble upon fresh ideas, creative expressions, and, maybe, a bit of magic each time you write.

Inspirational And Motivational Content Creation

No Comments

Inspirational and motivational content creation isn’t just about saying the right words. It’s about sparking something in people that can move them to action, reflection, or lasting change. I often see it compared to the work of a sculptor: starting with a raw idea and gradually shaping it into something powerful and unforgettable. This isn’t about what you recognize. This is about what you feel before your mind tries to name it.

Abstract sculpture with flowing shapes and light, resembling inspiration.

Understanding Inspirational And Motivational Content Creation

Getting messages across that lift people up or push them to act takes more than just clever writing or a catchy quote. It’s actually about finding honest stories, relatable emotions, and real-life moments that readers or viewers can connect with. Like a sculptor eyes a block of marble, looking for the shape inside, I try to uncover what matters at the core of each message I want to share.

Inspirational content focuses on hope, possibility, and overcoming setbacks. Motivational content zooms in on action, personal growth, and making changes. There’s a pretty big overlap, but understanding the feel and focus of each one helps me decide which approach to use, and how to blend them for the biggest impact.

It’s not just about the words. Images, videos, music, or even short audio clips can be super powerful ways to create that experience that lifts people up or pushes them to go for something they want. Tapping into these creative forms is a lot like how sculptors use texture, shape, and light to get across certain feelings or ideas.

Getting Started With Your Own Inspirational Content

Before I even start brainstorming topics, I always focus on the “why” behind what I want to create. What’s the feeling I want people to walk away with? Am I aiming to fire them up to pursue a goal, or to show them they’re not alone if life feels hard? Knowing this upfront shapes everything I make, right down to the words I choose and the story’s rhythm.

For beginners, building a strong foundation is all about these basics:

  • Clarity of Message: Decide what you want to say and make it as clear and direct as possible. People won’t stick around for mixed signals.
  • Authenticity: People can spot fluff or forced positivity a mile away. Drawing from your own wins, losses, or even everyday struggles is much more powerful. Think of it like pulling out the form in a sculpture that was always there, rather than slapping something on the outside.
  • Format: Try different delivery methods, maybe writing, audio, or visual content. Sometimes a simple quote with the right photo can have more impact than a long essay.
  • Audience: Consider who you’re trying to reach. Each person brings their own block of marble, so to speak, and you’re just helping them see what’s possible in it.

Quick Guide to Crafting Uplifting Content

I like to break it down into easy steps that work for almost any platform or format:

  1. Start with an Honest Story: It could be your own, or something you’ve seen happen around you. The best pieces always start from something that really happened.
  2. Find the Core Message: What’s the lesson, or the “a-ha” moment you want to highlight?
  3. Use Relatable Language: Keep the words simple and down-to-earth. People connect with what feels real, not what just sounds fancy.
  4. Add Visuals for Texture: A strong photo, sculpture, or simple graphic can anchor your message and bring the feeling home. Sometimes it’s the flow of a sculpture’s lines that inspires, not its recognizable subject.
  5. End with a Nudge: This can be a call to action, a question to mull over, or just a moment that sticks in someone’s mind. You don’t always have to tell folks what to do, sometimes, just showing them what’s possible is more than enough.

These steps keep the process clear, and help me avoid content that just sounds good but doesn’t really reach anyone.

Common Roadblocks and How To Overcome Them

Creating uplifting or motivational content has its share of challenges, both in coming up with ideas and connecting with an audience. Here are a few common bumps in the road, with some ways I’ve learned to work through them:

  • Self-Doubt: Wondering if what you have to say matters? Try sharing small, day-to-day stories. Sometimes what feels ordinary to me has a big impact on someone else.
  • Staying Genuine: It’s easy to slip into overused phrases or “toxic positivity.” Balance your content by showing the tough stuff too, not just the success at the end. People relate to the work that goes into the sculpture, not just the shine of the finished piece.
  • Creative Burnout: Keeping the ideas fresh can get tough. I find inspiration by exploring other forms of creativity, taking a walk among interesting public sculptures or spending time outdoors gives me new ideas I can bring back into my writing or videos.
  • Engagement Fatigue: Not every post is going to blow up, and that’s okay. Focus on feedback and real conversations, not just the numbers. Like a sculpture that means more up close than from far away, sometimes your best impact happens in quiet ways.

Self-Doubt

Plenty of folks (myself included) have looked at their rough drafts and thought, “This isn’t inspiring enough.” The trick is just to keep working and sharing anyway. Think about working clay or stone with your hands. The first try might look rough, but you find the right lines and shapes by showing up consistently.

Staying Genuine

It’s easy to fall into the trap of thinking you have to sound upbeat all the time. The truth is, the real spark comes from being honest. Your readers will feel it, just like they sense honesty in a piece of art.

Creative Burnout

Taking breaks matters more than most realize. Visiting museums, exploring installations, or even just changing up your space can get ideas flowing again. Viewing different sculptures, for example, can nudge your brain in new directions and open up fresh ways to craft words or images.

Engagement Fatigue

Numbers might not always line up with effort. A single, heartfelt comment from a reader who felt moved is usually worth far more than dozens of empty likes. Look for genuine connections first; the stats can follow after.

Moving forward sometimes just means showing up, chipping away at the marble, and believing that shape is there, even if you can’t see it yet.

Tips And Tricks For Creating Memorable Motivational Content

Here’s how I try to keep things both memorable and meaningful:

Lean Into Sensory Details: Paint pictures with words, colors, or sounds. Sometimes just describing the way sunlight falls on a sculpture inspires a sense of possibility or wonder.

Focus On Turning Points: People remember transformation, the “before and after,” or the struggle that gave way to progress. Highlighting those moments connects at a human level.

Use Analogies To Art: Comparing growth or change to something physical, like sculpture, helps ideas click. Just as a sculptor chips away at excess, motivational content can help people see what’s possible when they let go of doubt or fear.

Invite Reflection Over Instruction: I get the best engagement when I ask questions, not just offer answers. For example, “What would you sculpt with a fresh block of time?” goes further than “You should use your time better.” By inviting people to mull over their own possibilities, you draw them into the experience.

These approaches make content more memorable and so much more personal. Adding a bit more detail, you could try incorporating exercises or prompts for your audience. For instance, after sharing a story, ask them to write or think about a moment of change in their own life and what shape their ‘sculpture’ might take. The goal is to create not just readers, but participants who carry your message into their everyday choices.

Inspirational Content In The Real World

The impact of uplifting content goes way beyond screens and pages. Motivational stories and visual pieces are everywhere, from classroom walls to public parks. Think of abstract sculptures that people see on city walks. Sometimes those pieces stick with you, making you wonder, pause, or reconsider something in your own life.

  • Community Spaces: Murals and sculptures often inspire whole communities, offering a sense of pride or hope or a reminder that everyone can create something lasting. Sometimes, seeing a new mural pop up can shift how an entire neighborhood feels about itself.
  • Social Media: Quick, shareable posts often reach more people than a long speech ever could. These “minisculptures” of thought help keep inspiration coming at just the right moment, letting people connect and share those sparks with friends, family, or their own audience. By turning everyday observations into micro stories, you amplify your reach and help positivity spread fast.
  • Personal Growth: Motivational content supports people in setting goals, working through challenges, or even just getting out of bed each morning. The ripple effect of reading a simple, honest message can mean the difference between giving up and trying again that day.

What’s truly powerful is that this kind of content creates a cycle. As more people are moved by authentic stories and fresh perspectives, they feel encouraged to share their own, building communities bound by empathy and the possibility of change for the better. This synergy leads to lasting impact, both online and off.

Frequently Asked Questions

These are a few questions people ask me all the time about shaping truly inspiring content:

Question: What makes inspirational content really work?
Answer: It’s about honesty and emotion more than fancy language. The best pieces make people feel something, just like powerful sculptures do. Sometimes you can’t look away.


Question: How do I find my own style?
Answer: Look at creators, artists, or even sculptors you admire. Notice what makes their work feel “real” to you, then practice bringing that same honesty to your own voice. Over time, your unique style will shine through in a natural way.


Question: Where can I find inspiration if I feel stuck?
Answer: Walk through a park, visit a local museum, or scroll through posts from creators in very different fields. When you’re open, even a shadow cast by a sculpture can spark a new idea. Also, try talking to people about what inspires them. Sometimes, the act of listening can kindle new ways to approach your own creative work.


Final Words

Motivational content creation is a meaningful pursuit, a bit like sculpting. Often, you work patiently to reveal something special under the surface, both for yourself and the people who find your work. Trust the process, keep exploring new ways to share your stories, and remember: the feelings you create often stick with people long after the words fade. Your effort shapes more than just content. It shapes an experience that can inspire change, reflection, and action in everyone it reaches. Stay true to your vision, and keep chipping away until you see your purpose take form in the hearts and minds of others.

Ceramic Sculpture Techniques Online Course For Beginners

No Comments

Ceramic sculpture is a creative path that gives you the freedom to shape raw clay into all sorts of forms, from playful figures to modern art pieces. If you’re starting out, jumping into an online course focused on beginner ceramic sculpture techniques can fast-track your confidence and help you skip a lot of common headaches. My goal here is to break down what you’ll need to know and what to look for in your first ceramics course online, so you can turn your vision into reality (and have some fun getting your hands a little dirty).

A sunlit pottery table with various ceramic sculptures, fresh clay, and sculpting tools scattered around. In the background, shelves display colorful beginner ceramic pieces with plants nearby.

Why Try an Online Ceramic Sculpture Course?

Stepping into ceramics can feel a little intimidating at first, especially without someone right there to show you how to get that slab or coil just right. Online courses now fill that gap, bringing studio-quality teaching into your home. You’ll usually find easy-to-follow video lessons, interactive feedback from instructors, and plenty of tips for sourcing your materials.

Many online ceramic classes are self-paced, so you don’t have to rush. You get to press pause, rewind, and replay as often as you need. This flexibility is super useful if you’re juggling other hobbies, work, or family life. Plus, you’ll meet a community of learners who are figuring things out along with you. Seeing other beginners share their progress is pretty motivating and gives you fresh ideas for your next project.

Some online courses also pair guides and downloadable resources with their videos. These extras can help you picture how techniques work before you try them on your own. Engaging in a course means you’ll have support and feedback even if you’re working solo at your kitchen table.

Main Tools and Materials for Beginner Ceramic Sculptors

Good tools and the right materials can make learning ceramic sculpture smoother. If you’ve ever walked into an art supply store and felt overwhelmed by shelf after shelf of clay and sculpting gadgets, you’re not alone. Here are the basic things you’ll want to have on hand for a beginner’s online class:

  • Clay: Most beginner courses suggest starting with airdry, lowfire, or earthenware clay. These kinds are easy to handle and don’t need super high temperatures.
  • Basic Tools: A simple toolkit usually comes with a wire cutter, wooden modeling tools, a sponge, a loop tool, and some needle tools. That’s plenty to get going.
  • Work Surface: Even a sturdy table covered with canvas or an old towel is fine to start. No fancy pottery wheels required for sculpture basics.
  • Reference Images: Keeping some photos or sketches nearby really helps shape your idea before you pick up a tool.
  • Plastic for Covering: Clay dries quick, so you’ll want some plastic wrap or bags to cover your piece when you step away.

What You’ll Learn: Common Beginner Ceramic Sculpture Techniques

An online beginner course usually focuses on three main handbuilding techniques, each with its own vibe and possibilities. Here’s how they usually break down:

  • Pinching: Pinch pots are often the first thing taught. This is just what it sounds like, you shape a ball of clay by pinching it between your fingers, turning it into little pots, bowls, or even simple animal forms.
  • Coiling: Rolling the clay into long ropes (or coils) lets you build up taller, larger, or more complex shapes. You smooth the coils together with your fingers or a tool so it all sticks and looks seamless.
  • Slab Building: Slabs are flat pieces of clay rolled out using a rolling pin or a slab roller. You cut and shape these pieces like puzzle parts and join them together with a bit of water or slip to build geometric sculptures or boxes.

Most courses walk you through each technique with step-by-step demos. You’ll also get practice blending “score and slip” methods, which just means scratching the clay surface and adding gooey clay so the parts stick together.

How to Set Up a Small Home Workspace for Ceramics

You don’t need a fancy studio to make ceramic sculptures. Just a little planning and a couple of things will do the trick:

  • Clear a tabletop that you can keep messy for a while. Clay tools and dust can leave traces, so plan for easy cleanup.
  • Cover your table with canvas, a plastic sheet, or an old towel. This stops the clay from sticking and keeps crumbs off your furniture.
  • A bucket of water and a couple of sponges are super handy for cleaning up your hands, tools, and workspace.
  • A shelf or box keeps unfinished pieces safe, and some plastic wrap keeps your clay soft for your next session.

Lighting also matters, especially if you’ll be working in the evenings. A bright desk lamp can help you spot details and avoid mistakes as you shape and carve your pieces. Having some storage containers nearby is useful for keeping your clay moist and your tools organized. If you share your space with others, a portable setup makes it easier to clean up and store your work between sessions.

Steps To Take Before Starting Your First Online Class

  1. Check Course Reviews and Credentials: Look for courses with lots of positive student reviews, clear photos of finished projects, and experienced instructors. Some offer genuine feedback and Q&A support.
  2. Prep Your Tools and Clay: Try to order your supplies ahead so you’re ready for that first session. Many courses send out a list of what you’ll need.
  3. Review Course Structure: Good courses show the full curriculum up front, broken into manageable lessons. This helps you set time aside and track your own progress.
  4. Test Your Tech: Make sure your computer, tablet, or phone works for watching videos. A stable internet connection stops interruptions from messing with your flow.

Common Hurdles for Ceramic Beginners (and How to Handle Them)

If you’re anything like me, your first few sculptures will probably be more “charming” than “museum-worthy.” That’s part of the fun. Here are some struggles folks face, plus what’s helped me and others get through them:

  • Cracks in Clay: Clay dries at different rates, especially if it’s thick in some spots. Try wrapping your piece in plastic between sessions and let it dry slowly to help with cracks.
  • Parts Not Sticking: If pieces come apart, but you swear you pressed them together, try scoring both areas with a needle tool and using slip (watery clay) before pressing them together. This acts like glue.
  • Overworking the Clay: Messing with clay too much can make it dry out or get weak. If it gets too dry, wrap it up and let it rest with a bit of water until it’s softer.
  • Finding a Kiln: Some projects need kiln firing, but lots of online classes are built around airdry clay so you don’t need special equipment. For kiln-fired pieces, check local art centers or community colleges. Sometimes they let beginners rent kiln space for a reasonable fee.

Beginner Tips to Boost Your Ceramic Sculpture Progress

Building confidence in ceramics takes repetition and a little bit of playfulness. Here are a few quick tips I wish I’d known sooner:

  • Make Small Pieces: Small sculptures are faster to build and less likely to crack as they dry.
  • Keep Tools Clean: Wipe off your tools as you go, clay buildup can make detailed work awkward.
  • Don’t Rush Drying: Let your finished piece dry slowly, under plastic, before painting or finishing. Quick drying can mean more cracks.
  • Be Patient: Every sculptor messes up their first hand. Redoing things is part of how you learn!
  • Try Out Texture Tools: Use forks, stones, leaves, or old toothbrushes to make textures. This adds interest and personality to your pieces, even if the shape is simple.

Don’t be afraid to experiment with colors once your sculpture is dry. Watercolors, acrylics, or specialty ceramic glazes all make your project pop, even if it’s your very first try. Keep a journal of your projects—sometimes looking back shows just how much skill you’ve picked up, even if it doesn’t feel that way at first.

Popular Beginner Projects In Ceramic Sculpture Courses

Online courses for new ceramic sculptors usually include projects like:

  • Pinch pot animals. Cute and quick to finish
  • Simple coil vases or planters
  • Slabbuilt candle holders or boxes
  • Abstract sculpture. Just playing with forms and texture

These projects are great because you see instant results, which keeps you excited to improve. As you learn, instructors often show tricks for adding texture, painting, or glazing your finished sculpture to bring it to life. Trying a new project each week gives you more practice and encourages you to work through mistakes. It can also be fun to mix in some variety by attempting themed challenges, like holiday ornaments or seasonal decorations.

Frequently Asked Questions

Question: Can I really learn ceramic sculpture from an online course if I’ve never touched clay before?
Answer: Definitely. Most beginner courses assume you’re starting from square one and focus on hands-on demos, not art theory. Having videos you can replay helps you catch every step. The stepbystep guidance makes it easy to follow along, even if you’re feeling uncertain at the start.


Question: What if I don’t have a kiln?
Answer: Many beginner classes suggest airdry clay, which doesn’t need a kiln. For classic ceramics, art centers and shared studios often fire pieces for a small fee. You can also find local pottery groups where people rent kiln time or even help each other with firing tips.


Question: How messy does it get?
Answer: There will be some clay and dust to clean up, but a covered table and some sponges keep things pretty tame. Kids and pets might love the process just as much as you. Wearing an apron protects your clothes, and keeping a small broom or brush nearby makes cleanup easy.


Question: Can I use polymer clay in a sculpture course?
Answer: Some online ceramic courses include tips for customizing projects with polymer clay, which cures in a regular oven. Just doublecheck the materials list for your course to see what’s covered. Sometimes, polymer clay is great for practicing shapes or learning how to add details before working with traditional clays.


Finding Your Own Style with Practice

It’s really important to keep experimenting as you go along. A lot of beginners pick up ideas from other students in a course, watching how people finish their work or add new shapes. Don’t feel boxed in by the lesson plan. Once you’re comfortable, try your own riff on a basic idea. Ceramics is all about play, surprise, and stumbling upon what makes your hands and ideas unique. The process is rewarding on its own, and you’ll start to see your skills shape up piece by piece.

Wherever you start, a beginnerfriendly online ceramic sculpture course helps you skip a lot of frustration and gives you space to grow. With every project, you take home a bit more confidence, and a handful of cool, handmade sculptures to set around the house (or gift to friends who can’t believe you made them yourself). The bottom line is that your first step into ceramics might feel a little messy, but it’s also fun and full of learning. Over time, you’ll find your own creative groove and enjoy the satisfaction of bringing a simple lump of clay to life with your own hands.

The Intersection Of Technology And Fine Art: Digital Innovations

No Comments

Fine art and technology might seem like they belong in separate worlds, but the reality is that digital innovations keep changing what’s possible and how artists express themselves. If you’ve ever wondered how traditional painting, sculpting, and other fine art forms are merging with software and digital tools, it’s a pretty exciting space right now. In this article, I’m going to point out some trends, tools, and ideas that are powering this intersection.

Abstract digital art installation with vibrant colors and technology-inspired shapes.

How Digital Tools Are Reshaping Fine Art Creation

Digital tech is all over the fine art scene, and it’s popping up in many forms. From graphic tablets and 3D modeling to interactive installations powered by code, new gear and software are unlocking creative paths artists never had before. Traditional painters have started experimenting with digital brushes, while sculptors can use software to prototype and 3D print objects, saving time and material costs.

Market growth for digital art matches this trend. The global digital art market is already worth billions, boosted by collectors, galleries, and even museums stepping into the online world. This switch doesn’t mean classic art skills get tossed aside, but adding tech tools can really expand an artist’s toolkit.

These innovations aren’t only about effects. They help artists work faster, test new ideas more easily, and share their creations with people all over the world. Imagine an artist who traditionally only showcased their paintings locally; now, with online galleries and social media, their work can attract global attention instantly.

In fact, some artists have found that combining traditional methods with digital tools allows them to break creative boundaries. For example, a painter might photograph their canvas and use digital software to experiment with new color schemes or overlay additional textures, all without changing the original.

Starting Out: Key Technologies Artists Are Using

If you’re thinking about dipping your toes into digital fine art, it’s helpful to get a sense of the main tools and terms. The equipment and software landscape might look kind of overwhelming, but some choices are pretty userfriendly even if you’re new to this field.

Artists are using digital drawing tablets, 3D printers, augmented reality (AR), and software for everything from simple sketches to advanced digital paintings. Each of these tools offers something unique, so here are a few you might see mentioned a lot:

  • Drawing Tablets: These let artists draw directly into software like Photoshop or Procreate, providing the feel of pens, brushes, and more, but in a digital form.
  • 3D Modeling Software: Programs like Blender or ZBrush let artists build virtual sculptures and even print them out using 3D printers.
  • Augmented Reality (AR): Apps that let viewers experience art in their own space by layering digital images over real life using a smartphone or tablet camera.

Many artists layer these tools to produce mixed media works that blend digital and traditional elements. That helps them create pieces with textures, effects, and interactions that would be tough or impossible using only classic materials.

Some artists even use sound or motion sensors, adding another dimension to their digital work. The marriage of technology and creativity leads to expanded opportunities for expression, inviting people to experience fine art in completely new ways.

Step-By-Step: Getting Started with Digital Fine Art

Jumping into digital fine art is easier than it might seem. Here’s a quick guide to get you going:

  1. Pick Your Platform: Decide if you want to use a computer, tablet, or even your phone. Many beginners start with basic drawing programs on tablets.
  2. Choose Your Tools: Try sketching apps or 3D design programs first. Most have beginner tutorials and friendly communities online.
  3. Experiment and Practice: Test out digital brushes, layer effects, or 3D modeling features. Saving digital work at every step makes it simple to undo mistakes or revisit old versions.
  4. Share and Connect: Post work online for feedback, join forums, or follow other digital artists. Community is huge in the digital art world; it’s easy to get support and ideas from others.
  5. Blend Techniques: Don’t think you have to go all in digital. Lots of artists scan drawings or use photos of real-life paintings as a starting base, then use editing software to add digital elements.

Starting simple and exploring as you go makes the whole process much less intimidating. Plus, most of these options won’t break the bank and can be adapted as you grow your skills.

If you’re feeling stuck, tackling online challenges or prompts is a great way to push yourself and try out new techniques. With each new tool or method you experiment with, you’ll build a bigger creative toolbox.

Points to Weigh Before Investing in Digital Art Tech

Jumping into digital fine art does come with a few things to keep in mind. Common challenges involve software costs, keeping up with new versions, creative “block” when learning tech, and the question of authenticity in the digital age.

  • Software and Gear: Many programs offer free versions or student discounts. Testing before you buy helps avoid wasting money.
  • Learning Curve: Some software has tons of features, which can be intimidating. Following beginners’ tutorials on YouTube or community sites helps a lot.
  • Artistic Identity: There can be a feeling of “Is my work really art if it’s digital?” but community acceptance is growing and digital fine art is more recognized than ever before.
  • Safe Sharing: It’s smart to watermark your work or look into NFTs and copyright best practices before putting things online.

Software and Hardware Choices

Tablets and laptops designed for creative work can get expensive quickly, so shop around and read reviews. Some favorite affordable drawing tablets are the Wacom One and Huion Kamvas. Many artists also like iPads with Procreate, which has a onetime purchase fee and is easy to learn.

Upgrading your tech setup isn’t always necessary at the start. A basic tablet and a free digital art program can help you improve before you jump into professional gear. The key is to keep making work and learning on the go.

Skill Building and Inspiration

You’ll find loads of online courses and free resources. Skillshare, Udemy, and YouTube are packed with artistled lessons. Following other artists and trying group challenges (like Inktober or 36 Days of Type) is great for practice and jumping into the digital art community.

Art communities are full of creative prompts, techniques, and feedback. Keeping an eye out for opportunities to share your art helps build both skill and confidence.

Copyright and Art Theft

Making sure your art stays yours is important, so watermarking images before posting online helps. If you’re serious about selling or licensing, looking into digital rights management and platform policies is a good move.

Digital portfolios and secure marketplaces like Behance or ArtStation provide options to show and sell your art safely. Protecting your work online is part of the process for all digital artists.

Working through these hurdles is completely possible with a bit of patience and the right resources. Most difficulties fade with regular practice and some creativity in finding solutions.

Advanced Techniques and Strategies

Once you feel comfortable creating digitally, there’s a whole universe of advanced options. Digital art isn’t limited to drawing and painting. Lots of creators use algorithmic art, interactive installations, or even Artificial Intelligence as part of their process.

Generative Art: By using code, artists design systems that generate unpredictable patterns or visuals. Tools like Processing or p5.js are fun starting points that don’t require serious coding experience.

Mixed Reality: Combining realworld sculpture or painting with digital overlays in augmented reality can make an exhibit a lot more interactive for viewers visiting galleries, or even for people walking by with a smartphone.

Collaborative Projects: Digital technology makes it easy to work together across the globe. File sharing, live streaming, and virtual meeting tools mean artists can cocreate without being in the same room, or even the same continent.

Getting into these methods can keep your art fresh and open doors to new ideas and audiences. I’ve found that even artists who don’t stick with digital innovation forever still pick up techniques that breathe life back into their more traditional art practices.

For those who like to experiment further, combining digital fine art with sound or motion graphics can help your work stand out. You aren’t limited to visual art alone; the possibilities for crossdisciplinary mixes are growing fast.

Where Digital Fine Art Shows Up in the Real World

Some of the coolest examples of digital fine art happen at the intersection of online and offline spaces. You’ll find this kind of art at museums, festivals, social media, and even onlineonly galleries. Here are some examples you might see:

  • Interactive Installations: Events like teamLab Borderless in Tokyo use projections, sensors, and sound to create shifting digital environments visitors can interact with.
  • Online Showcases: Platforms like Artsy or Saatchi Art let artists upload and sell digital originals and prints to collectors worldwide.
  • AR Art Walks: Some cities are hosting AR “walking tours,” where visitors use smartphones to see digital art layered over realworld architecture or landscapes.

Digital art also pops up in media and entertainment, such as animated films, concept art for games, and even digital collectibles known as NFTs. These platforms help digital fine artists find new audiences and build a following in ways that weren’t possible before the internet’s rise.

Meanwhile, collaborations between digital artists and traditional craftspeople happen more often as artists look for fresh ways to blend old and new. These partnerships may result in projects featured at major museums or public spaces, proving digital fine art is here to stay.

FAQs for New Digital Fine Artists

I get a lot of questions from artists new to digital fine art. Here are some of the most common:

Question: Can I mix traditional and digital techniques in my art?
Answer: Absolutely! Scanning sketches, painting over digital prints, or adding handdrawn textures to digital pieces are common ways to blend both styles.


Question: How do I display or sell digital art?
Answer: Digital platforms like Etsy, Gumroad, and ArtStation let you sell prints, originals, or even NFTs. Some artists also use Instagram and TikTok to grow a following and point people to their art shop or commissions.


Question: Will digital fine art replace traditional methods?
Answer: Not likely. Most artists see digital and traditional methods as different options, each with their own strengths. You don’t have to pick just one!


Digital Innovations Are Expanding Fine Art’s Possibilities

The intersection of technology and fine art keeps glowing up, creating so many new opportunities for artists at every level. With a mix of traditional skills and new tech, anyone can find a style or workflow that fits them. There’s space for everyone, from digital painters making wild, virtual worlds to sculptors 3D printing their next masterpiece. So don’t be afraid to experiment, stay creative, and keep an eye out for where these creative paths will head next.

Learning 3D Modeling Techniques: Best Courses For Beginners

No Comments

Starting with 3D modelling opens up a world where your ideas can become digital realities. Whether you’re dreaming of making art, designing game assets, or creating printable objects, there’s never been a better time to start learning 3D modelling from scratch. As someone who’s spent hours tinkering with different programs, I know how overwhelming those first steps can feel. Here’s a plain-English guide to help you get going, with the best beginner courses and practical know-how I’ve picked up along the way.

A computer screen displaying a colorful beginner-friendly 3D modeling workspace with simple geometric shapes and a toolbox

Why Learn 3D Modelling?

3D modelling is a super useful skill in today’s tech-forward world. It brings together art and engineering, shows up in everything from blockbuster movies to medical simulations, and gives you control over how things look and function. Learning to model in 3D also sets you up for bigger projects; like animation, visual effects, and even crafting things you can 3D print at home. If you’re curious, patient, and love solving visual puzzles, 3D modelling offers lots of creative fun and future job opportunities.

How to Learn 3D Modelling as a Beginner?

Figuring out where to start is a common challenge. The best approach is to pick a user-friendly program and follow a guided course that walks you through basic tools and concepts. Here’s how I suggest easing in:

  • Pick a Beginner Course: Start with a course designed for complete newbies. There’s no need to guess your way through it; good courses explain everything step by step.
  • Use Starter Projects: Practice by making simple things like mugs, boxes, or game dice. This helps you get a grip on all the basic tools.
  • Follow Along with Videos: Watching someone model in Realtime and copying their steps is super helpful, especially at first.
  • Join Online Forums: Communities like Blender Artists or Reddit’s r/3Dmodeling are filled with friendly folks happy to answer beginner questions.

Consistency matters more than perfection when starting out, so aim for regular short sessions rather than marathon weekends. Even ten to fifteen minutes a day can build up your confidence and skill set quickly. Don’t worry if your early projects look simple or a little clunky—everyone starts there, and steady progress is the real goal.

What is the Best Program for Learning 3D Modelling?

The best program depends on your goals, but for most beginners, Blender stands out because it’s free, opensource, and widely used in both pro and hobbyist circles. Blender gets regular updates, has a buzzing online community, and plenty of video tutorials tailored for absolute beginners. You can download it from blender.org. Other great starter options include Tinkercad for quick printable models, SketchUp for architectural work, or Fusion 360 for engineering projects. Each program suits different interests, so try out a couple if you want to get a feel for what clicks with you.

If you’re totally new to 3D and want to see what it’s about without spending a cent, Blender Guru’s Donut Series on YouTube is an excellent way to start. For more structure and direct support, Udemy’s Complete Blender Creator is beginner friendly and well reviewed. If you lean toward 3D printing, try out Tinkercad starter projects; they guide you through everything with hands-on browser-based lessons.

other Courses for Learning 3D Modelling as a Beginner

There are tons of 3D modelling courses, but not all are meant for beginners. Here are some of the best starter courses, based on clear instruction, practical projects, and strong community feedback:

  • Introduction to 3D Modelling with Autodesk: Autodesk’s official site offers free tutorials and sample projects for both Tinkercad and Fusion 360.
  • Udemy: Complete Blender Creator: This paid course is highly organized for total beginners, teaching you modelling, texturing, and simple animation with clear, easy to follow lessons.
  • Skillshare: 3D Modelling for Beginners: The lesson structure is straightforward, making it easy to start your first projects in just a few evenings. Some classes offer free trials for new users, so you can dip your toes in risk-free.

Choosing a course depends on your learning style. YouTube is great for visual learners and won’t cost anything, but structured courses on Udemy or Skillshare help you keep on track and break the process into manageable steps.

What are the Most Important Concepts in 3D Modelling?

There are a few foundational ideas you’ll run into right away as you get into courses or tutorials. Understanding these saves you hours of confusion down the line:

  • Vertices, Edges, and Faces: These form the building blocks of every shape you make in 3D. A mesh starts as simple points (vertices), lines connecting those points (edges), and surfaces created by those lines (faces).
  • Mesh vs. NURBS: Most beginners work with mesh modelling, using tools that move, scale, and shape vertices, edges, and faces. NURBS modeling is more common in advanced industrial or automotive modeling.
  • Extrusion: This handy tool lets you pull out new shapes from an existing face, one of the quickest ways to build up complexity.
  • Modifiers: Programs like Blender offer modifiers—settings that automatically tweak geometry, like mirroring one side or adding some smoothing for a more organic feel.
  • UV Mapping: This process is about laying out a 2D image or texture on your 3D shape. It’s a must-have for colouring or adding details to your model.

Getting comfortable with these ideas early on, especially extrusion and UV mapping, makes every project go smoother as you advance.

Get comfortable with vertices, edges, and faces, learning how to use extrusion, and understanding the basics of UV mapping are super important. Knowing these basics helps you model just about anything you want.

What Are the Basics to Know Before You Start Your 3D Modelling of Any Object?

Jumping into a 3D project without a bit of preparation can quickly lead to frustration. Here are some basics I always check before starting any new model:

  • Reference Images: Track down pictures or simple sketches of what you want to model. Even basic objects have subtle details that help you stay focused and accurate.
  • Scale: Figure out how big or small your model should be, especially if you want to print it or insert it in a specific digital setting.
  • Modelling Approach: Decide if you’ll start with basic shapes and tweak them or begin with a blank cube and build from there.
  • Keep it Simple: For your first models, pick objects with simple structures and not too many fiddly parts.

Planning with these steps makes the modelling journey way less stressful. If you’re ever stuck, ask for advice on community forums—folks are usually helpful and quick to jump in with tips.

Can I Learn 3D Modelling on My Own?

Learning 3D modelling by yourself is absolutely doable. Most people in the field are self-taught, relying on free videos, community forums, and online guides. Set small, frequent goals (like crafting one new object each week) and share your progress to get helpful feedback. Treat mistakes as learning steps. You don’t need a college degree or expensive course to get skilled—the real proof is in your portfolio and your willingness to push forward and ask for advice.

Tips for Sticking With It

Staying motivated as a beginner can be tricky, especially when real life gets busy or you hit a creative block. Here are a few things that helped me stay engaged:

  • Break Down Big Projects: Don’t start off aiming for a full character or spaceship; build smaller parts, like a cup or a button, and eventually combine them.
  • Save Often: 3D software can crash unexpectedly. Get into the habit of saving your work every few minutes to avoid heartbreak.
  • Ask for Feedback: Seek tips from forums or Discord groups—outside eyes often catch things you miss.
  • Experiment: Don’t shy away from errors. Sometimes next level cool models come from happy accidents or out of the box ideas.

Building a habit of regular, bite-sized practice, sharing your creations, and letting yourself have fun even when projects aren’t “perfect” makes huge progress over time. Remember, the 3D modelling community is big and welcoming, so don’t hesitate to reach out.


Ready to Get Started?

Jumpstarting your 3D modelling adventure is all about taking small, steady steps, making simple things, and getting help when you get stuck. With excellent beginner courses and supportive communities available, you’ll be bringing your own digital creations to life before you know it. Keep experimenting, keep sharing your work, and have fun watching your skills grow!

Privacy Policy

No Comments

Who We Are

At awrsculpa.com, we are committed to maintaining the trust and confidence of all visitors to our web site. In particular, we want you to know that awrsculpa.com is not in the business of selling, renting or trading email lists with other companies and businesses for marketing purposes.

In this Privacy Policy, we’ve provided detailed information on when and why we collect personal information, how we use it, the limited conditions under which we may disclose it to others, and how we keep it secure.

We take your privacy seriously and take measures to provide all visitors and users of AwrSculpa.com with a safe and secure environment.

Cookies

awrsculpa.com may set and access AwrSculpa.com cookies on your computer.  Cookies are used to provide our system with the basic information to provide the services you are requesting.  Cookies can be cleared at any time from your internet browser settings.

Google Analytics

When someone visits AwrSculpa.com we use a third party service, Google Analytics, to collect standard internet log information and details of visitor behaviour patterns. We do this to track things such as the number of visitors to the various parts of the site and interactions with the site. This information is processed in a way which does not identify anyone. We do not make, and do not allow Google to make, any attempt to find out the identities of visitors to our website.

Website Comments

When someone visits awrsculpa.com, there may be an ability to submit comments on particular articles or pages.  When comments are submitted, you are entitled to use aliases or information that completely hides your identity. When a comment is submitted, the relevant details (name, email, website) that you provide are stored.  These details are stored so that we can display your comment back to you, and to anyone viewing the comment sections on the site. We do not verify information entered nor do we require verification.

Third Parties

There may be some circumstances where your IP address, geographic location, and other browser related details may be shared with third party companies.  We may share your above mentioned data with following third party companies from time to time.

Access to Your Personal Information

You are entitled to view, amend, or delete the personal information that we hold. Email your request to our data protection officer Abdilahi at abzdillahi@hotmail.co.uk and we will work with you to remove any of your personal data we may have.

Changes to Our Privacy Policy

We may make changes to our Privacy Policy in the future, however, the most current version of the policy will govern our processing of your personal data and will always be available to you.

If we make a change to this policy that, in our sole discretion, is material, we will notify you by an update or email, where possible. By continuing to access or use our services, you agree to be bound to the terms of our Privacy Policy.